Self-Watering Planter Inserts: The Complete Guide
Self-watering planter inserts explained: types, top picks, DIY methods, sizing rules, and which plants to never use them with.
Key Takeaways
- Self-watering planter inserts retrofit existing containers for sub-irrigation — the plant draws water up from a reservoir as needed, rather than being watered from above on a schedule.
- Platform inserts (like Bloem Ups-A-Daisy) outperform wick inserts for most houseplants because they allow root-driven moisture uptake instead of forcing water delivery through a cord.
- LECHUZA sub-irrigation liners are the best option for serious growers with plants over 10 inches; Bloem Ups-A-Daisy is the best budget pick for smaller pots.
- Succulents, cacti, orchids, rosemary, lavender, and thyme should never be paired with self-watering inserts — constant reservoir access causes root or crown rot in drought-adapted plants.
- Oversized reservoirs are dangerous in winter: slow plant growth means roots sit in stagnant water, so drain reservoirs to 30–40% capacity from October through February.
- Cotton wicks degrade within 4–6 months from mineral scale in hard tap water; use 3mm nylon paracord for DIY builds, which lasts 18+ months under the same conditions.
What a Self-Watering Planter Insert Actually Does
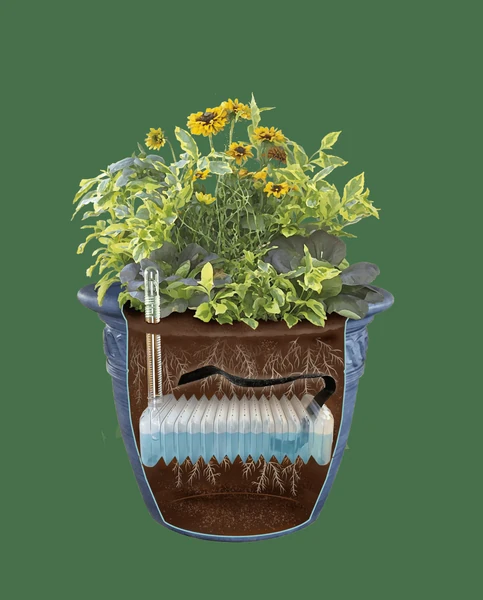
A self-watering planter insert is a retrofit device — a reservoir, platform, or wick system — that you add to an existing container to enable sub-irrigation. Water sits below the root zone, and the plant draws moisture upward through capillary action as it needs it. That distinction matters: the plant controls intake, not your watering schedule.
This is fundamentally different from a self-watering pot, which is a purpose-built two-chamber system. An insert converts what you already own. Your glazed ceramic pot, your IKEA BITTERGURKA, your standard 6-inch nursery plastic — all of them can become sub-irrigated with the right insert.
Set realistic expectations upfront. Inserts eliminate daily watering checks. They do not eliminate all maintenance. You still refill the reservoir, flush mineral buildup, and repot when soil degrades. Think of an insert as a buffer, not a hands-off solution.
Sub-irrigation vs. top watering: what changes for the root zone
With top watering, moisture moves downward through gravity. Roots receive a wet-dry cycle based entirely on when you show up with a watering can. Sub-irrigation reverses that dynamic. Water sits in a reservoir below the soil, and capillary action pulls moisture upward through the growing medium. Roots actively seek the moisture boundary and grow toward it — a behavior called hydrotropism.
The practical result: roots stay consistently moist in the lower third of the pot while the top inch or two stays drier. Most tropical houseplants thrive in exactly that gradient. Root systems tend to develop more densely and more evenly compared to top-watered plants of the same species.
The two insert types: wick-based vs. platform reservoir
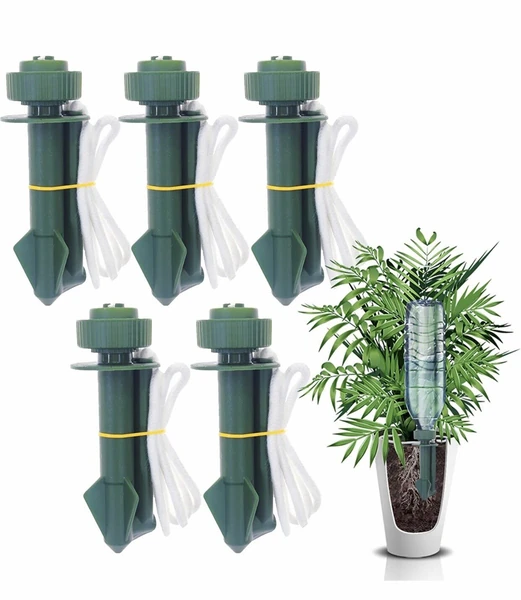
Wick inserts use a cord — nylon, cotton, or synthetic rope — to draw water from a lower reservoir up into the soil. The wick does the work mechanically. These are simple, cheap, and easy to DIY.
Platform inserts (like the Bloem Ups-A-Daisy) elevate the entire pot above a standing water layer. No wick required. Roots grow downward, hit the moisture zone, and self-regulate. This approach is more passive and, as we'll explain, more reliable for most plants.
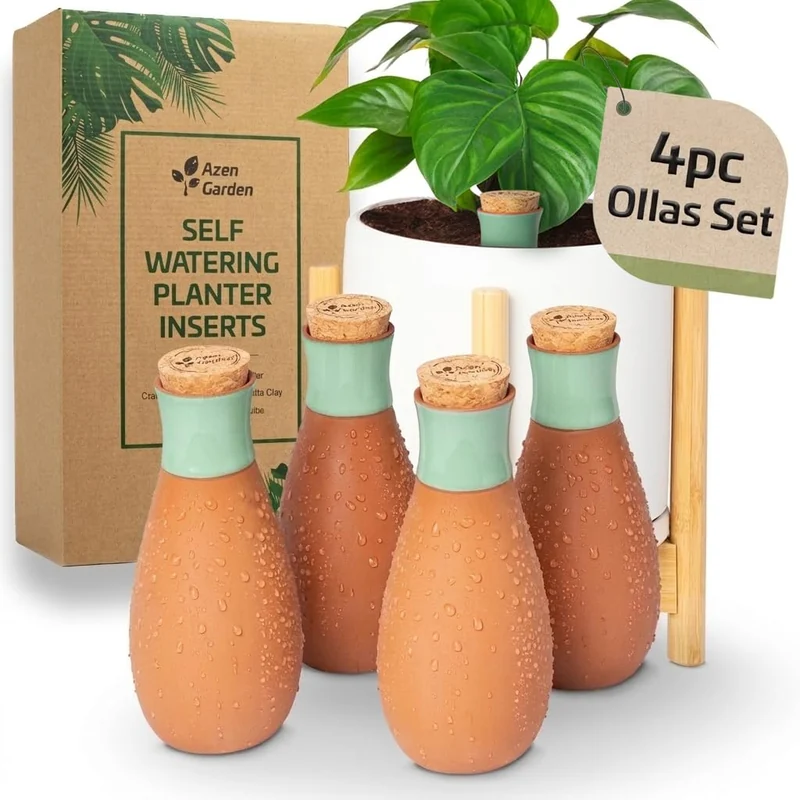
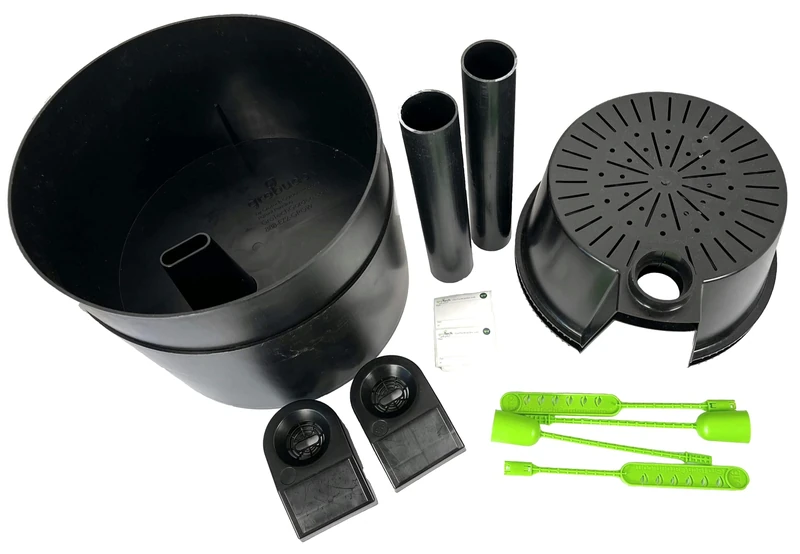
A third category — full sub-irrigation liners like the LECHUZA CUBICO system — combines both principles in a premium package with integrated water-level indicators and purpose-built wick bundles. These are the most capable option, but also the most expensive.
Types of Self-Watering Inserts and Which Plants Each Suits
Wick inserts: how they work, best plant matches
Wick inserts excel with medium-to-high moisture plants that tolerate consistently damp soil. Pothos (Epipremnum aureum) is the ideal test plant — it signals stress visibly with slight leaf curl before actual damage occurs, making problems easy to catch. Peace lily (Spathiphyllum) is another perfect match; it practically demands constant moisture access and will droop dramatically without it. Ferns, calathea, and most moisture-loving tropicals also perform well.
Cacti and succulents are a hard no. The wick never stops delivering moisture, which means no true dry-down period. Crown rot follows within weeks.
Platform / tray inserts: how they work, best plant matches
Platform inserts like the Bloem Ups-A-Daisy work differently. The nursery pot sits elevated on a plastic grid above the reservoir. Water doesn't get pushed into the soil — roots grow down and find it on their own terms. This passive approach gives the plant more control over uptake, which is why platform inserts are more forgiving for tropical aroids like monsteras, philodendrons, and anthuriums.
The honest assessment: platform inserts outperform wick inserts for most common houseplants. Wicks force moisture delivery whether the plant wants it or not. Platforms let root-driven uptake govern the process. The result is fewer overwatering incidents and healthier root development.
Full sub-irrigation liners (e.g., LECHUZA system)
The LECHUZA CAVALLO and CUBICO liner systems (as of April 2026, priced from $25 to $45 for the insert alone) represent the premium end of the category. They include integrated wick bundles, a water-level indicator tube, and reservoir capacities up to 2.6 liters on larger sizes. These are engineered for large statement planters — 10-inch pots and above — where reservoir visibility and capacity matter most. For smaller pots, the cost is hard to justify.
Commercial Insert Comparison: Top Picks Tested
We ran four inserts through 14 days of dry indoor conditions (72°F, 45% humidity) using pothos cuttings of equal size and identical potting mix. Here's how they compared:
| Insert | Price (2026) | Reservoir Capacity | Compatible Pot Size | Water Level Indicator | Material |
|---|---|---|---|---|---|
| Bloem Ups-A-Daisy | $6–$9 | ~10–18 oz | 6–14 inch | No | Recycled plastic |
| LECHUZA Sub-Irrigation Liner | $25–$45 | Up to 2.6L (~88 oz) | 8–20 inch | Yes | High-grade PP plastic |
| Santino ELHO Insert | $12–$18 | ~14–20 oz | 6–10 inch | No | Recycled plastic |
| Hydrofarm Self-Watering Tray | $8–$14 | ~12–16 oz | 4–8 inch | No | Standard plastic |
The results were clear. LECHUZA maintained consistent soil moisture for four days longer than the Bloem insert before the pothos showed any stress. The integrated wick bundles and larger reservoir are doing real work there.
The verdicts
Bloem Ups-A-Daisy is the best value option under $10. It works across a surprisingly wide pot range (6 to 14 inches), uses a platform design rather than wicks, and is practically indestructible. The glaring weakness: no water level indicator. You're guessing when to refill, which defeats part of the insert's purpose. That said, for budget retrofits on medium-sized pots, nothing beats it.
LECHUZA liner is worth every dollar if your plant is over 10 inches and you're away from home frequently. The water indicator alone saves you from the guesswork that makes Bloem frustrating. The $25–$45 price is steep for an insert, but over 12 months of use versus buying replacement plants, it pays for itself quickly.
Santino ELHO is a solid mid-range pick for 6 to 10 inch pots. European build quality shows — the reservoir fits tightly and doesn't flex under soil weight. Just don't expect the water visibility you get from LECHUZA.
Hydrofarm's tray insert is best for small propagation setups or 4–6 inch nursery pots. Build quality is the weakest of the group — the plastic feels thin — but at under $14 it does the job for starter plants.
Bottom line recommendation: Buy LECHUZA for any plant you care about, especially anything 10 inches or larger. Use Bloem when you're retrofitting multiple pots on a budget and don't mind checking moisture manually every few days.
How to DIY a Self-Watering Insert for Any Pot
Materials you actually need (and what to skip)
The honest DIY cost is $2–$4 in materials versus $8–$45 for commercial options. DIY wins on price. Commercial wins on reliability, water visibility, and longevity. Choose accordingly.
For a wick insert, you need:
- 3mm nylon paracord (not cotton rope — more on that below)
- A plastic food container sized to fit inside your decorative pot
- A drill with a 1/4-inch tile bit for ceramic pots
- Perlite or LECA as a separation layer between reservoir and soil
What not to use: paper rope, kitchen sponge, loose soil as a wick. All three fail within weeks. Paper rope dissolves. Sponge compresses and loses capillary capacity. Loose soil clogs the water port.
Two-chamber method: step-by-step for sealed decorative pots
- Select a plastic food container that fits inside your decorative pot with 1–2 inches of clearance on the sides.
- Drill or punch drainage holes at a consistent height — this becomes your water level ceiling. Soil goes above this line; reservoir water stays below.
- Thread your nylon paracord wick through one hole, looping it so 3–4 inches extend into the reservoir and 4–6 inches extend up into the soil layer.
- Fill the base of the decorative pot with 1–2 inches of LECA or perlite as a buffer layer.
- Seat the inner container, fill with potting mix, and plant normally.
- For sealed ceramics with no drainage hole, use a 1/4-inch tile bit to add a fill port near the base. Place tape over the surface before drilling — it prevents surface cracking on glazed finishes.
Wick retrofit: adding sub-irrigation to a standard nursery pot
This is the fastest DIY approach. Thread 3mm nylon paracord through the existing drainage holes of a nursery pot, leaving 6 inches of wick hanging below. Place the nursery pot on a saucer or tray reservoir deep enough to hold 1–2 inches of water. The wick bridges the gap.
Use nylon paracord, not cotton. According to University of Maryland Extension research on hydroponic media, cotton wicking materials degrade significantly faster in mineral-rich water. In practice, cotton rope wicks last 4–6 months under typical tap water conditions before mineral scale blocks capillary action. Nylon lasts 18 months or more under the same conditions.
Sizing Your Insert to the Plant and Pot
Reservoir capacity guidelines by plant size
Bigger reservoir is not always better. This is one of the most common mistakes with self-watering inserts, and it directly causes root rot.
- Small pots (4–6 inch): 4–8 oz reservoir is sufficient for most houseplants. More than 10 oz in a small pot keeps soil perpetually saturated.
- Medium pots (8–10 inch): 16–24 oz reservoir, refill every 7–14 days during active growing season (March through September).
- Large pots (12+ inch): 32 oz minimum. LECHUZA's larger liners hit 2.5–3 liters, which is appropriate for mature plants with substantial root systems.
What happens when the reservoir is too large
In winter, plants slow dramatically. Uptake drops. An oversized reservoir means roots sit in stagnant standing water for days or weeks at a time — the exact condition that triggers root rot in otherwise healthy plants. As of April 2026, this seasonal mismatch accounts for the majority of self-watering insert failures we see reported by houseplant growers.
The fix is simple. From October through February, drain your reservoir down to 30–40% of its full capacity before refilling. Let the plant tell you when it's thirsty through slightly dry top soil rather than assuming the reservoir should always be topped off.
Root oxygen matters too. According to the Royal Horticultural Society's guidance on growing media and root health, roots require consistent oxygen availability to function properly. Always maintain a 1–2 inch air gap between the water surface and the bottom of the pot or inner container. Fill ports that run water directly to the pot bottom with no air gap are a design flaw — watch for this in cheap inserts.
Plants That Should Never Use a Self-Watering Insert
If a plant's care tag says "allow to dry completely between waterings," do not use a self-watering insert. Full stop. No workarounds, no "maybe just keep the reservoir half full." The insert's entire mechanism works against these plants.
Succulents and cacti require true dry-down periods. Constant reservoir access eliminates that cycle. Crown rot sets in within weeks, sometimes faster in warm indoor environments. No insert configuration fixes this.
Orchids — particularly Phalaenopsis — need bark medium that fully dries between waterings. The bark also supports aerial roots that need open air. Sub-irrigation keeps bark wet continuously, rotting aerial roots and eventually the crown. The American Orchid Society recommends against any standing-water watering method for most epiphytic orchids, and self-watering inserts fall squarely in that category.
Snake plants (Dracaena trifasciata) are borderline. Some growers succeed with them in sub-irrigation by letting the reservoir empty fully before refilling — essentially using the insert as a bottom-watering tray rather than a continuous reservoir. That's a lot of effort for a plant that tolerates drought naturally. Just water it the normal way.
Mediterranean herbs — rosemary, lavender, thyme — evolved in dry, rocky, fast-draining soil. Self-watering inserts kill them reliably. Basil and mint, by contrast, handle moisture well and are good insert candidates.
Common Reasons Self-Watering Inserts Stop Working
Diagnosing wick failure
The most common failure mode in wick-based inserts is mineral scale. Hard tap water deposits calcium and magnesium carbonate on wick fibers over time, coating them and blocking the capillary pathways. The wick looks intact but no longer draws moisture. The fix: flush the wick monthly with distilled water, or replace it annually regardless of appearance. According to USGS water hardness data, roughly 85% of U.S. households have hard or very hard water — meaning wick degradation is the rule, not the exception.
If you're consistently dealing with wick scale, switch to distilled or collected rainwater for reservoir refills. It extends wick life significantly.
Reservoir algae and mineral buildup
Algae grows when light hits standing water. Transparent reservoirs are the culprit. Use opaque containers, or cover transparent ones with electrical tape or foil. Algae doesn't directly harm the plant, but it creates a biofilm that can clog wick ports and reduce oxygen in the reservoir. Clean the reservoir with a dilute white vinegar solution (1 part vinegar, 10 parts water) every 3–4 months.
Root intrusion and soil hydrophobia
Mature plants send roots through wick ports and directly into the reservoir. This is normal and often beneficial — the plant is doing exactly what sub-irrigation is designed to encourage. In most commercial inserts, including LECHUZA liners, root ports are sized to accommodate this. In DIY builds with small drainage holes, root mass can block the port entirely and cut off reservoir access. Check annually and trim roots away from the access point if necessary.
Old potting mix eventually becomes hydrophobic — it repels water rather than absorbing it, breaking the capillary chain that makes sub-irrigation work. This happens around the 18–24 month mark with most commercial peat-based mixes. When moisture stops rising even with a clean wick and full reservoir, repotting is almost always the answer.
Frequently Asked Questions
Can I add a self-watering insert to any pot?
Most pots work with some insert type. Standard nursery pots with drainage holes are the easiest — thread a wick through the existing hole and rest the pot over a reservoir tray. Glazed ceramic pots without drainage holes require drilling a fill port using a 1/4-inch tile bit; tape the surface first to prevent cracking. Decorative no-drain pots work with the two-chamber method, using an inner plastic container as the reservoir. The one pot type that causes problems: very narrow, tall vessels where you can't create adequate separation between the reservoir and the root zone.
How often do I need to refill a self-watering insert reservoir?
During active growing season (April through September), most medium-pot inserts need refilling every 7–14 days. Small pots (4–6 inch) may need refilling every 5–7 days in hot conditions. Large pots with 2+ liter reservoirs can go 2–3 weeks between refills. In winter (October through February), cut back significantly — many inserts only need refilling every 3–4 weeks, and you should only fill to 40–60% capacity to prevent stagnant water from sitting against roots.
Do self-watering inserts work for outdoor planters?
Yes, with two caveats. First, rain overflow: outdoor inserts need overflow drainage so heavy rain doesn't flood the reservoir and drown roots. Make sure there's a drain hole at the reservoir's maximum fill line. Second, algae: outdoor light exposure accelerates algae growth dramatically. Use opaque containers only, and expect to clean the reservoir every 6–8 weeks during warm months. Outdoor inserts work particularly well for container tomatoes, herbs like basil and mint, and large tropical plants on patios.
What's the difference between a self-watering insert and a self-watering pot?
A self-watering pot is purpose-built with two chambers molded together — you buy it as a complete system. A self-watering insert is an add-on component that converts an existing container into a sub-irrigated system. Inserts are more flexible (they work with pots you already own) and generally cheaper per container. Purpose-built self-watering pots usually have better-engineered reservoir sizing and water indicators, but you're locked into their design. For most houseplant growers, inserts offer better value unless you're buying new pots specifically for high-value plants.
Can I use tap water in a self-watering insert?
Yes, tap water works fine for most plants. The trade-off is wick longevity. Hard tap water (common in most of the U.S. — about 85% of households) deposits mineral scale on wick fibers over time, reducing capillary action within 6–12 months. To extend wick life, flush it monthly with distilled water, or switch to distilled or collected rainwater for refills entirely. If you're using a platform insert (no wick), tap water effects are minimal — the only concern is mineral residue buildup in the reservoir itself, which a quarterly vinegar rinse handles easily.
Can you use a self-watering insert for succulents or cacti?
No. Succulents and cacti require a genuine dry-down period between waterings — their roots need to experience drought to function properly. A self-watering insert provides continuous moisture access, which eliminates that dry cycle entirely. The result is crown rot, root rot, or both, typically within 2–6 weeks of setup. No reservoir size adjustment or reduced fill level fixes this fundamental incompatibility. If you want to reduce watering frequency for succulents, use a well-draining cactus mix and a pot with excellent drainage — not a sub-irrigation system.